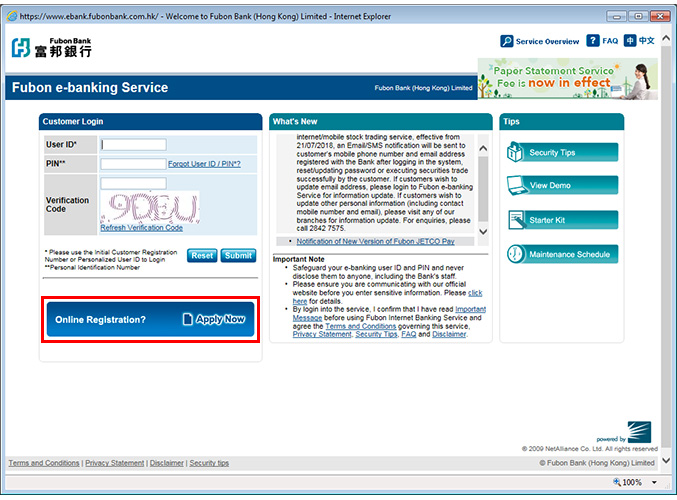
Choose "Apply Now"
Register Fubon e-banking Service
Register Fubon e-banking Service
Register
Identity
Verification
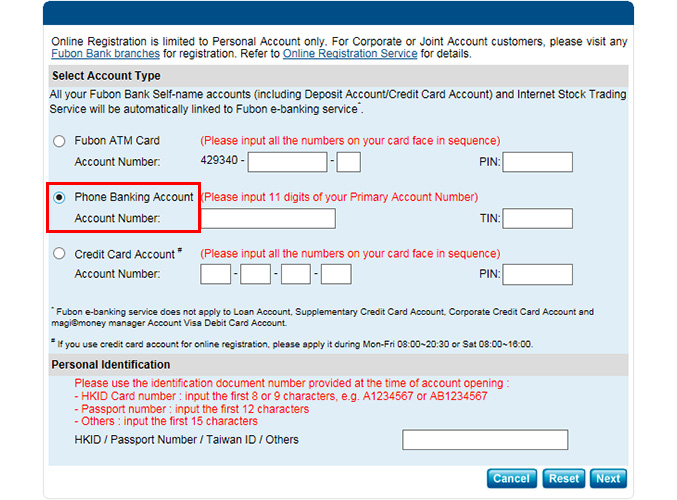
Step 1: Select Account Type
Identity
Verification
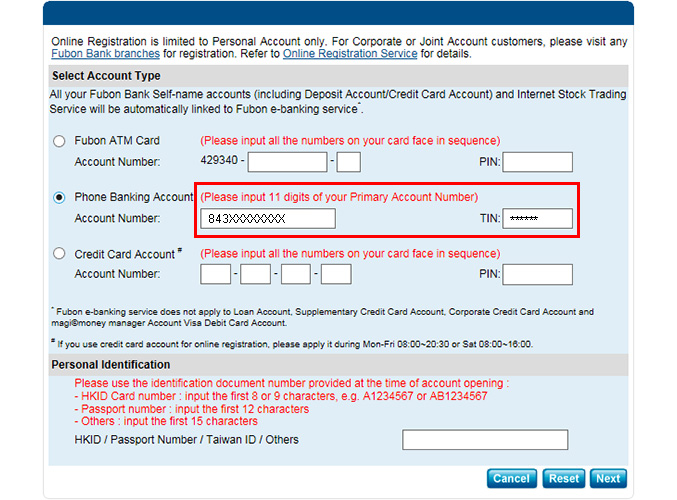
Step 2: Key in your Account Number and PIN/TIN
Identity
Verification
Step 3: Key in your identification document number
Identity
Verification
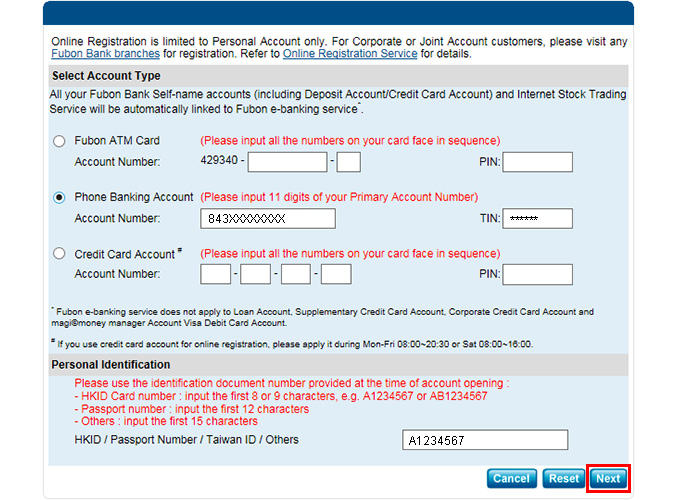
Step 4: Click "Next"
Set up
personalized User ID and PIN
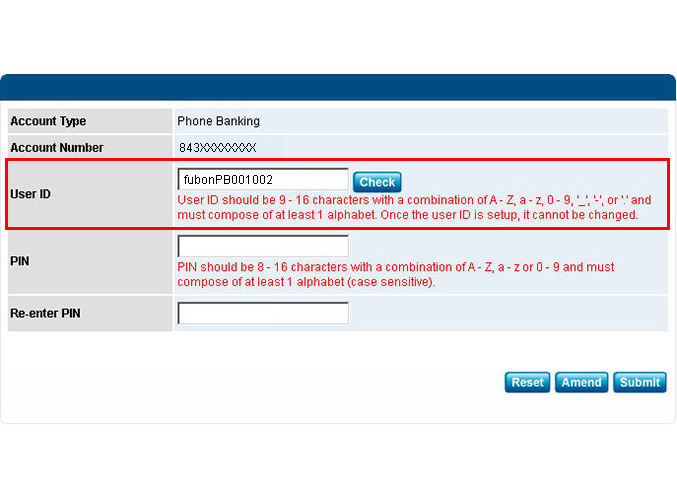
Step 1: Set User ID (9-16 alphanumeric)
Set up
personalized User ID and PIN
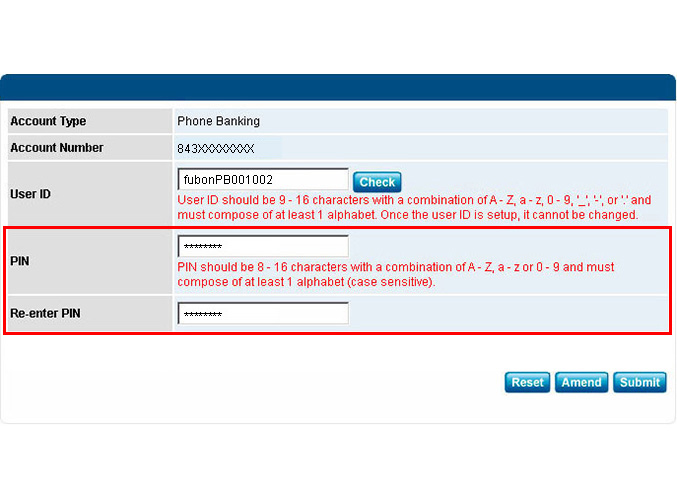
Step 2: Set PIN (8-16 alphanumeric)
Set up
personalized User ID and PIN
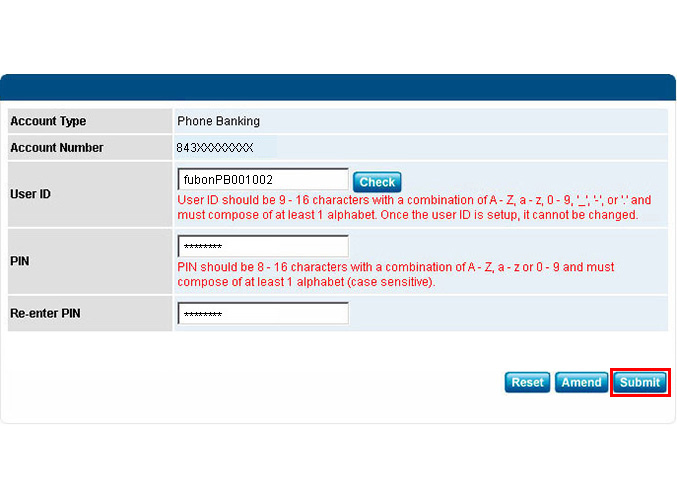
Step 3: Click "Submit"
Terms and
Conditions
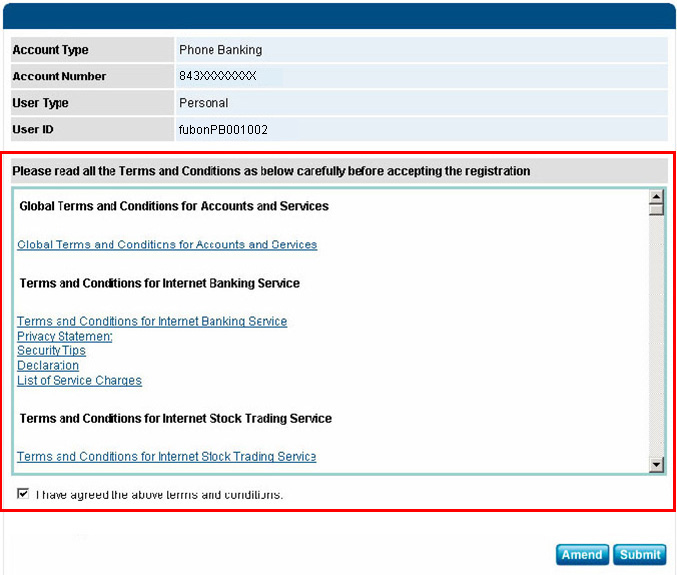
Step 1: Read and accept Terms & Conditions
Terms and
Conditions
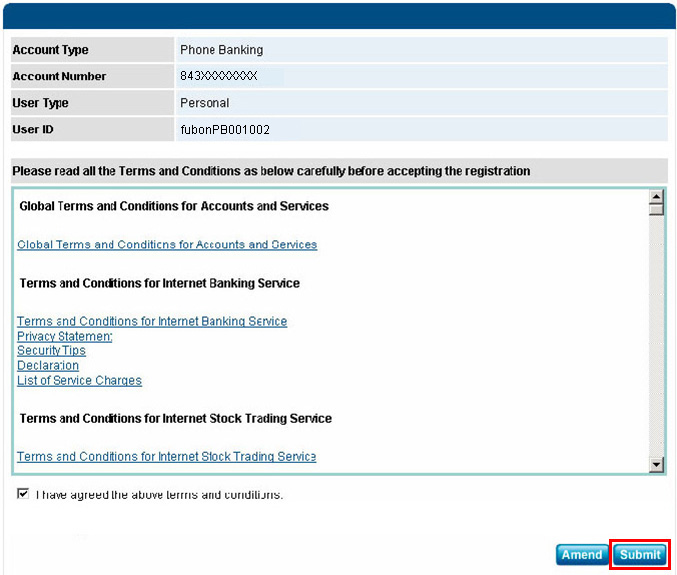
Step 2: Click "Submit"
The
registration is completed
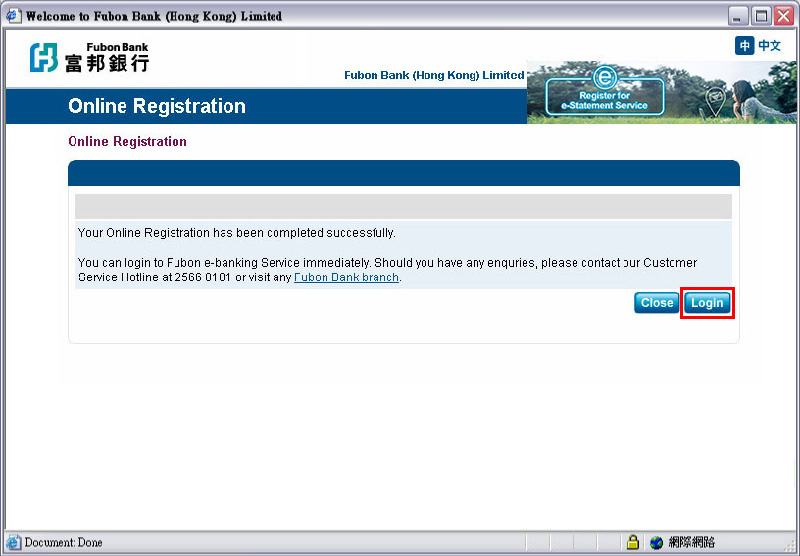
A confirmation letter will be mailed to you. You can log on to e-banking immediately, please click "Login"
Login

Input your User ID and PIN to log on to the e-banking service.
Logon to Fubon e-banking Service
Logon to Fubon e-banking Service
System Logon
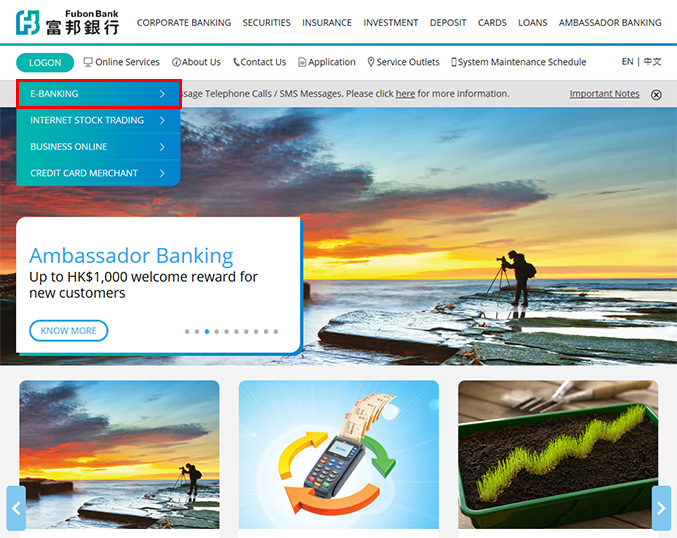
Step 1: Click on "E-BANKING" button on the menu
System
Logon
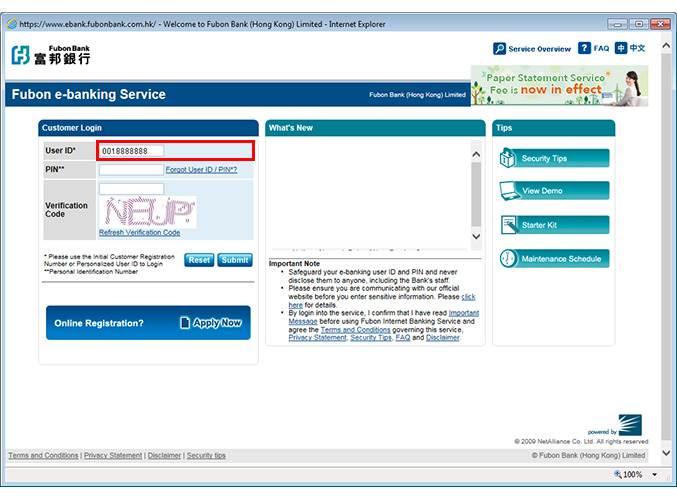
Step 2: Enter "User ID"
System
Logon

Step 3 : Enter "PIN"
System
Logon
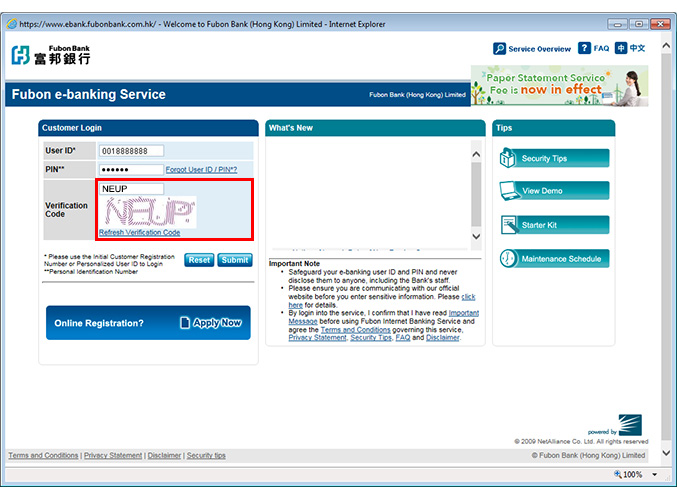
Step 4: Enter "Verification Code"
System
Logon
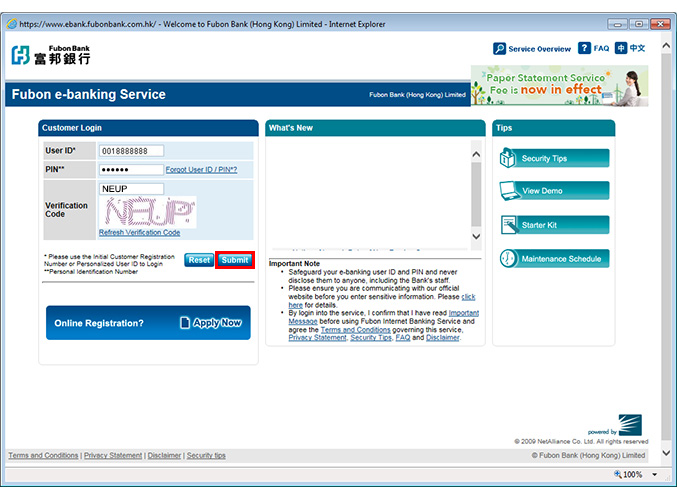
Step 5: Click "Submit" button to logon
System
Logon
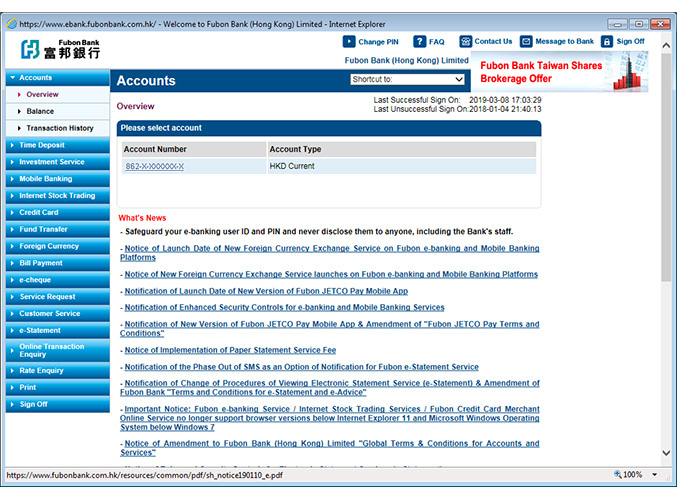
Login Successful
Fubon e-Statement Service
Fubon e-Statement ServiceView your
e-Statement
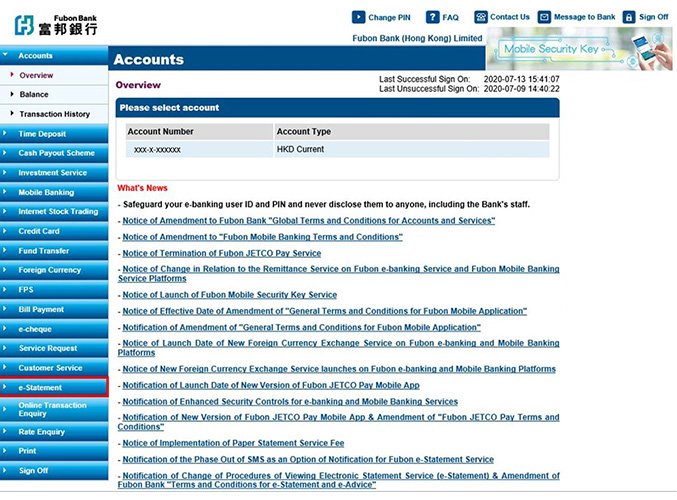
Step 1: Select "e-Statement"
View your
e-Statement
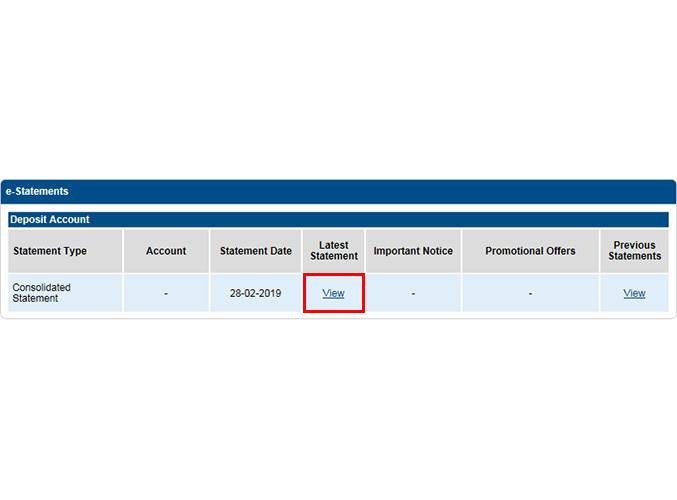
Step 2: Click "View"
View your
e-Statement
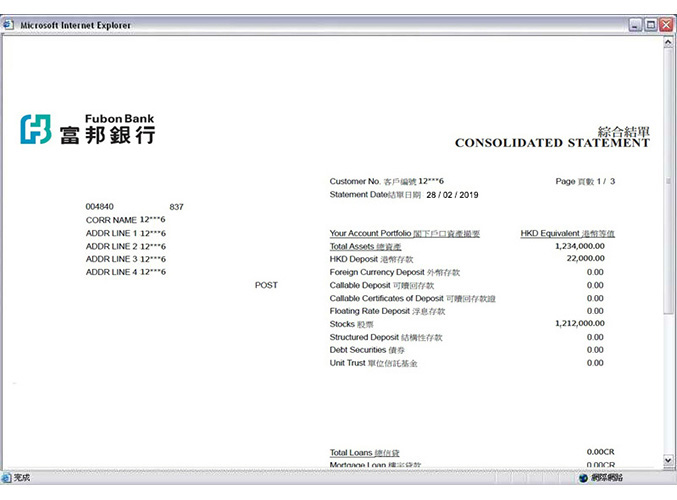
Completed
Activate e-Statement
Services
Step 1: Select "e-Statement"
Activate e-Statement
Services: Basic Maintenance and Terms
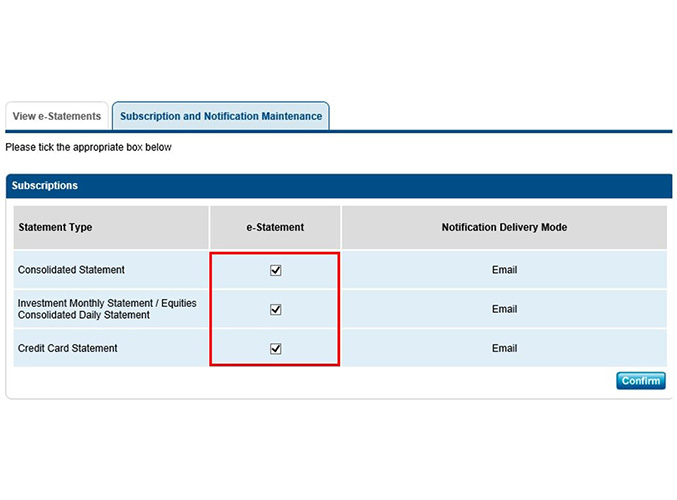
Step 2: Tick to select the type(s) of e-Statement to apply
Activate
e-Statement Services: Basic Maintenance and Terms

Step 3: Read and accept "Terms & Conditions for e-Statement & e-Advice"
Activate
e-Statement Services: Basic Maintenance and Terms
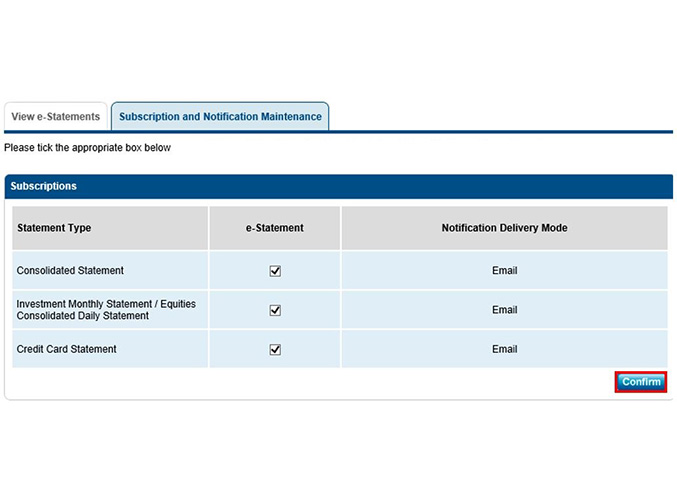
Step 4: Click "Confirm"
Activate e-Statement
Services: Registration is completed

Your e-Statement Registration is successfully completed.
Add/Change Email
Address

Step 1: Select "Customer Service"
Add/Change Email
Address
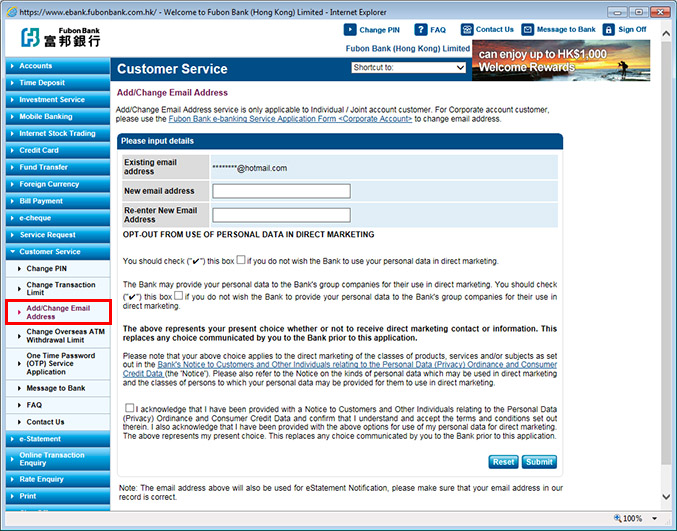
Step 2: Click "Change Email Address"
Add/Change Email Address:
Input E-mail Address Details
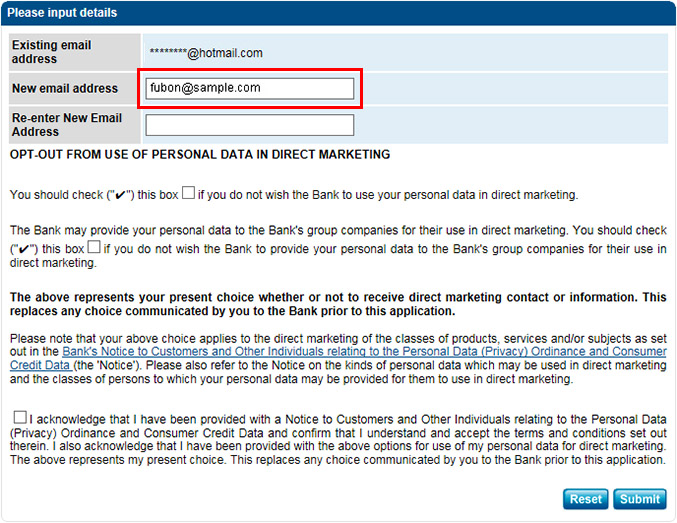
Step 3: Input your email address to "New Email Address"
Add/Change Email Address:
Input E-mail Address Details
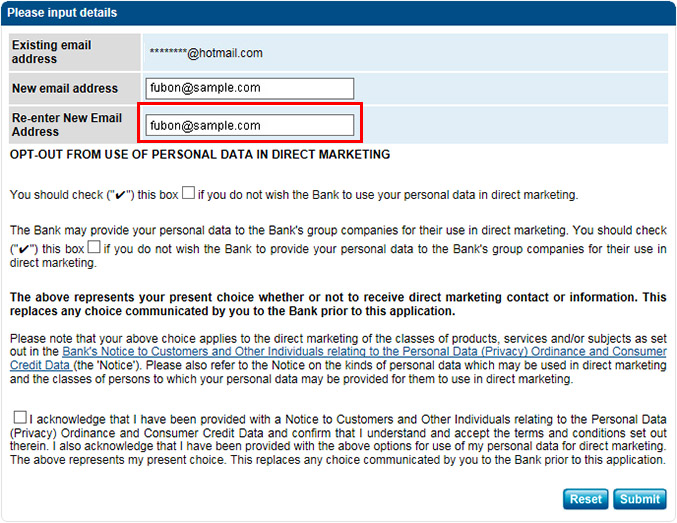
Step 4: Re-enter "New Email Address"
Add/Change Email Address:
Input E-mail Address Details
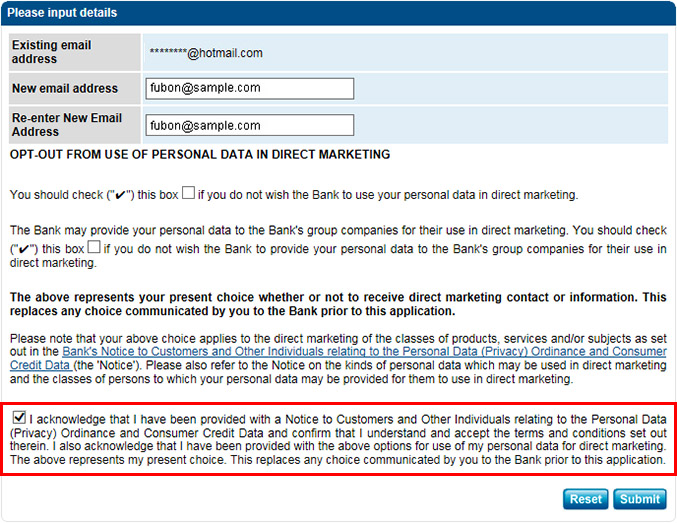
Step 5: Read and accept "Personal Data (Privacy) Ordinance and Customer Credit Data Notice"
Add/Change Email Address:
Input E-mail Address Details
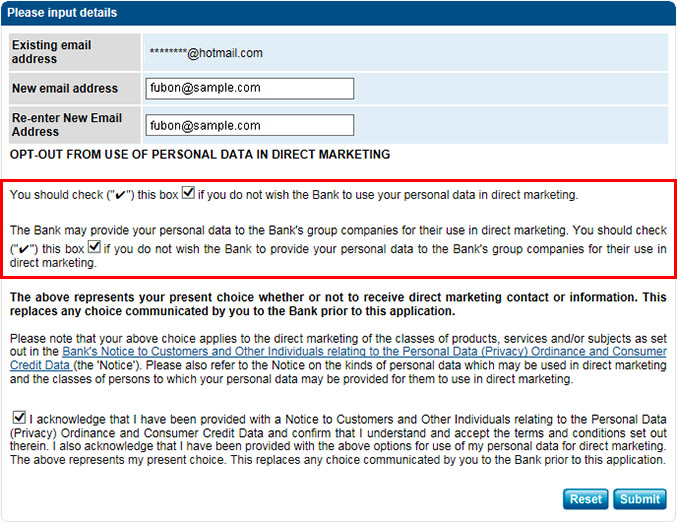
Step 6: Indicate your choice on opt-out from use of personal data in direct marketing
Add/Change Email Address:
Input E-mail Address Details
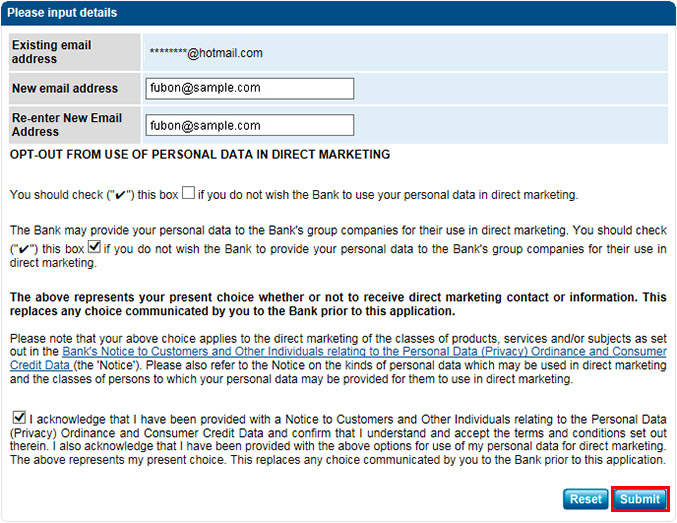
Step 7: Click "Submit"
Add/Change Email Address:
Data Integrity
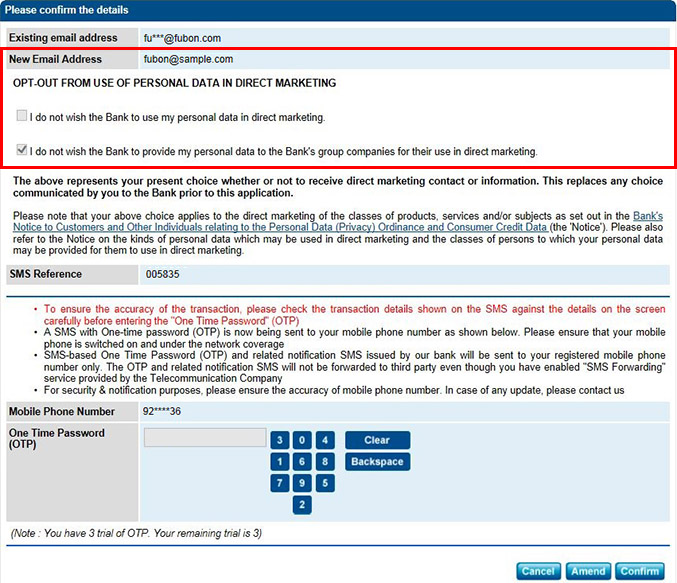
Step 8: Confirm the entered information is correct
Add/Change Email Address:
Data Integrity
Step 9: Input SMS-based "One Time Password" issued by our Bank
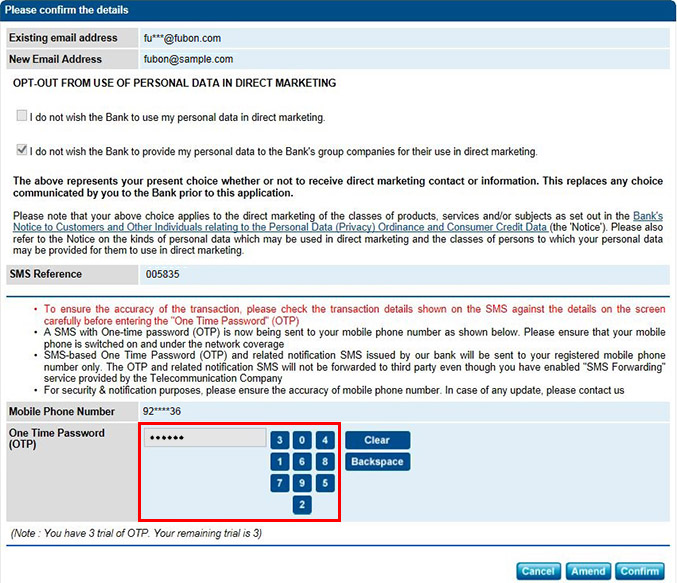
Add/Change Email Address:
Data Integrity
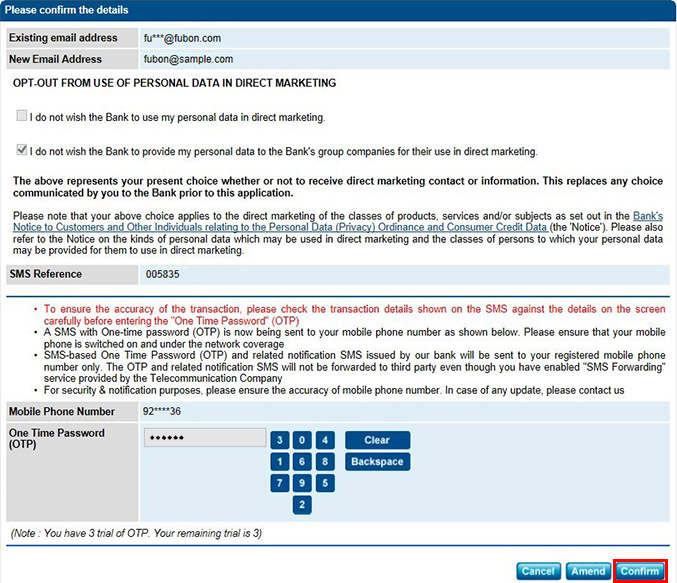
Step 10: Click "Confirm"
Add/Change Email Address:
Registration is completed
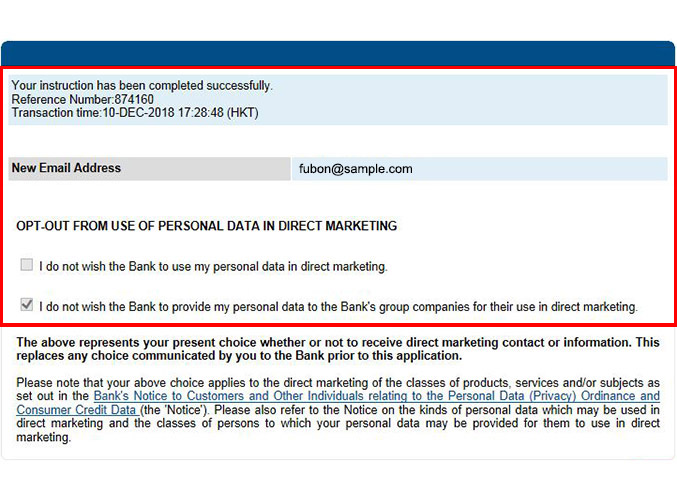
Your Email Address Registration and choice on opt-out from use of personal data in direct marketing are successfully completed.
Fubon e-Cheque Service
Fubon e-Cheque Service
Register e-Cheque Issuance
Service

Step 1: Select "e-Cheque"
Register
e-Cheque Issuance Service
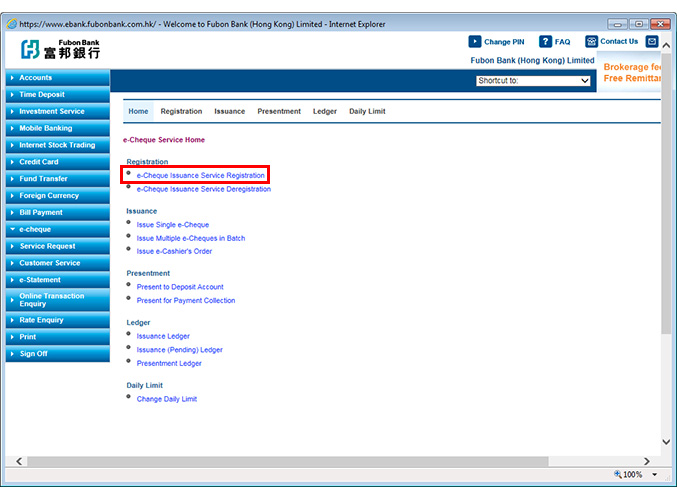
Step 2: Click "e-Cheque Issuance Service Registration"
Register
e-Cheque Issuance Service
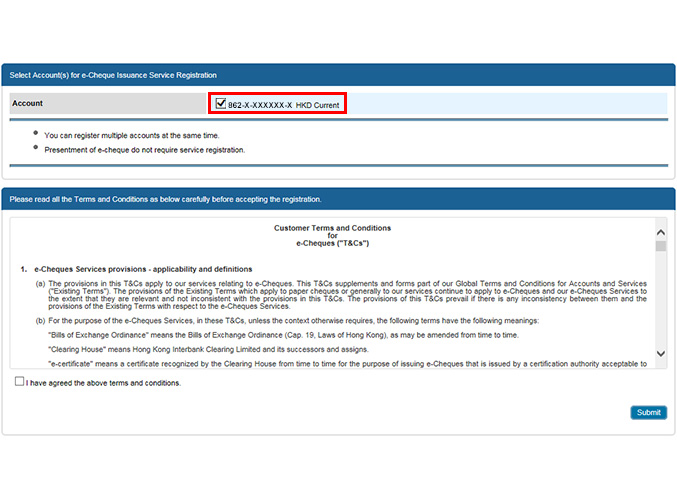
Step 3: Select account(s) for "e-Cheque Issuance Service Registration"
Register
e-Cheque Issuance Service
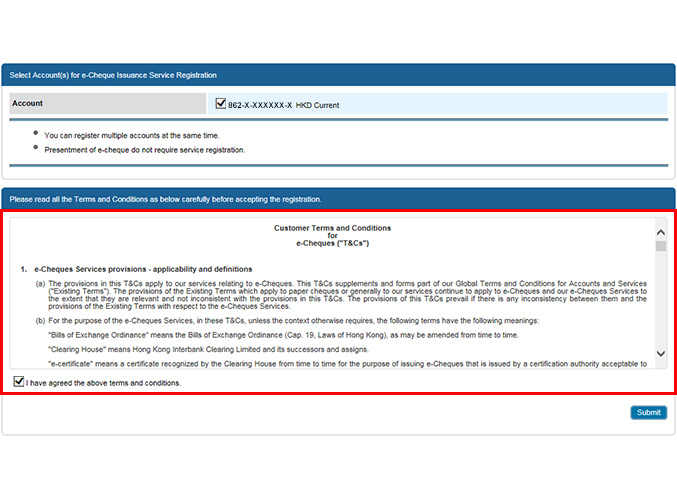
Step 4: Read and accept Terms and Conditions
Register
e-Cheque Issuance Service
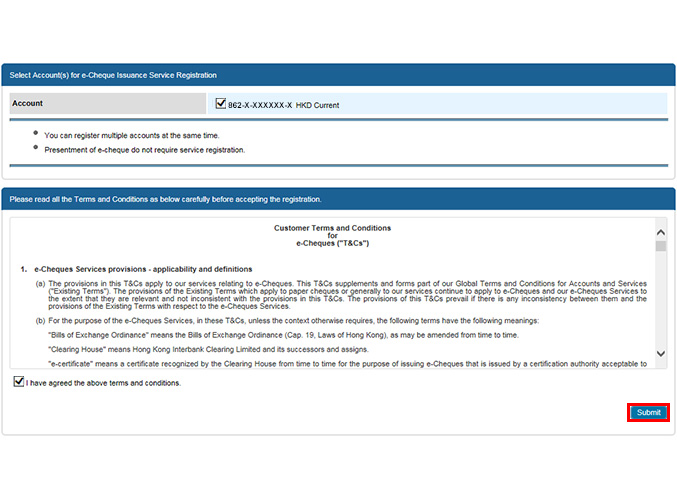
Step 5: Click "Submit"
Register
e-Cheque Issuance Service: Register e-Cheque Issuance Service
Transaction Limit
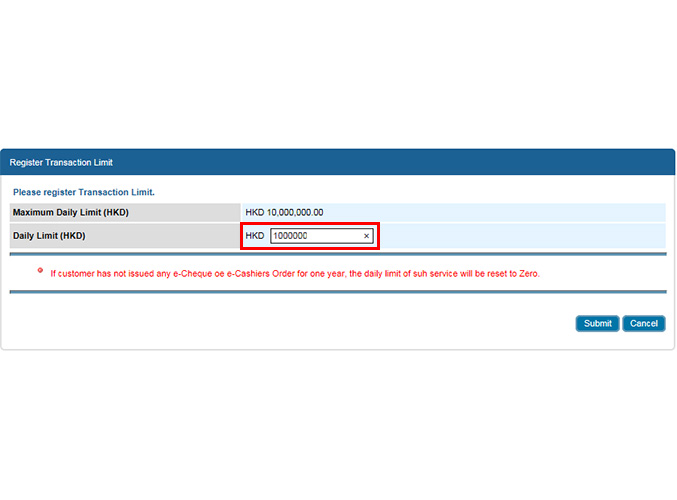
Step 6: Input Transaction Limit
Register
e-Cheque Issuance Service: Register e-Cheque Issuance Service
Transaction Limit
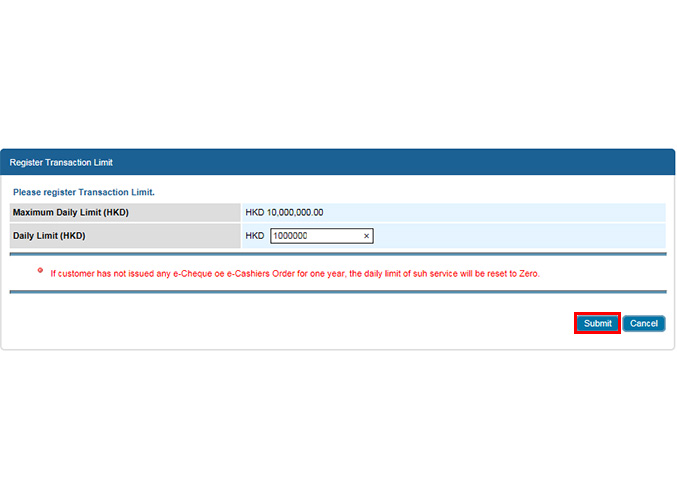
Step 7: Click "Submit"
Register
e-Cheque Issuance Service: Data Integrity
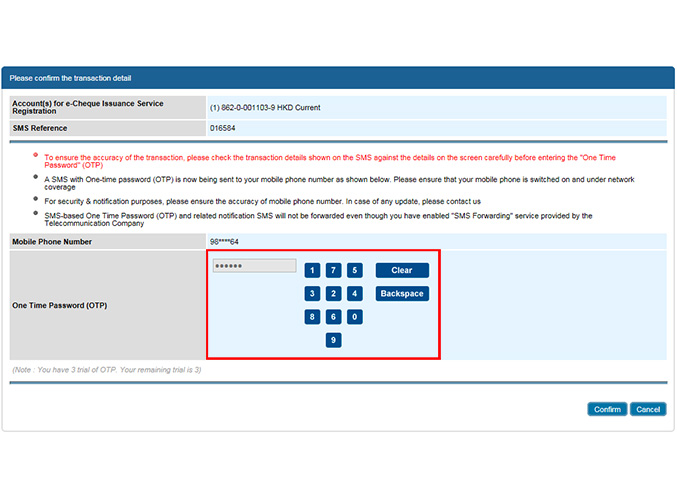
Step 8: Input SMS-based "One Time Password" issued by our Bank
Register
e-Cheque Issuance Service: Data Integrity
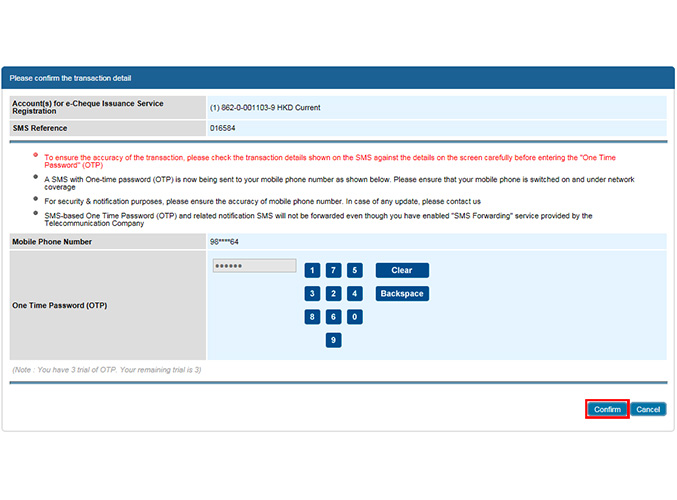
Step 9: Click "Confirm"
Register
e-Cheque Issuance Service: Registration is completed
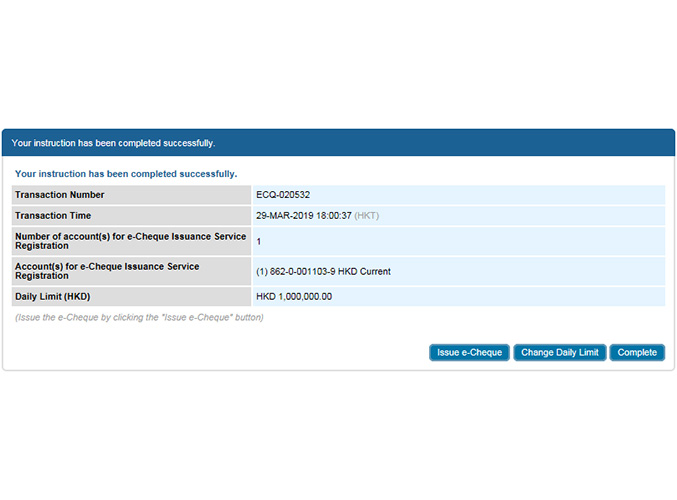
Your "e-Cheque Issuance Service Registration" is successfully completed.
Issue e-Cheque
Service
Step 1: Select "e-Cheque"
Issue e-Cheque
Service
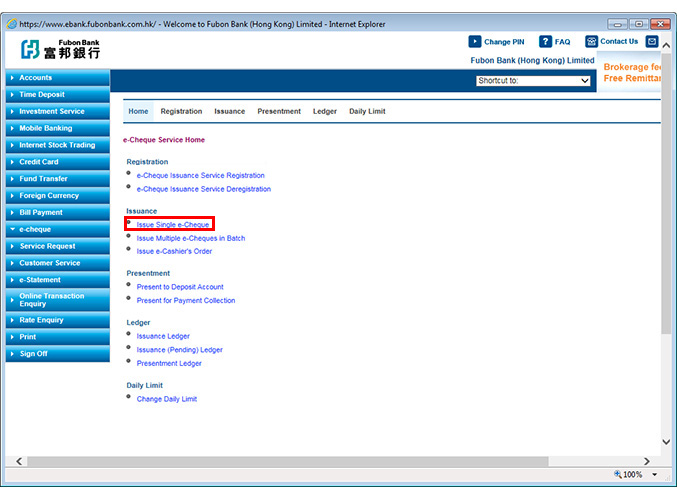
Step 2: Click "Issue Single e-Cheque"
Issue e-Cheque
Service
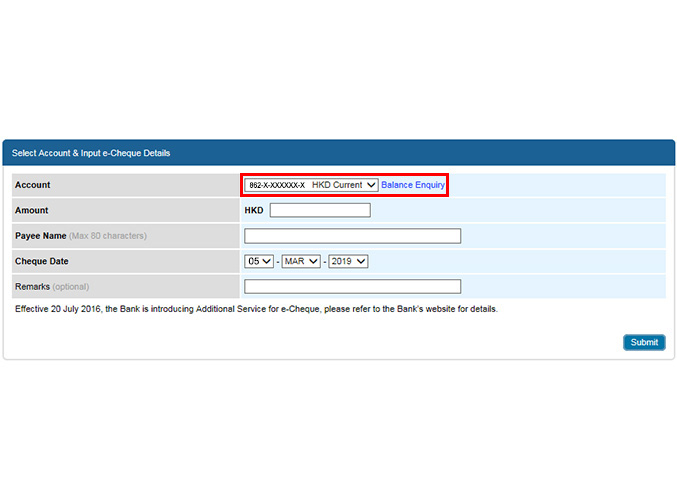
Step 3: Select account(s) for "Issue Single e-Cheque"
Issue e-Cheque
Service
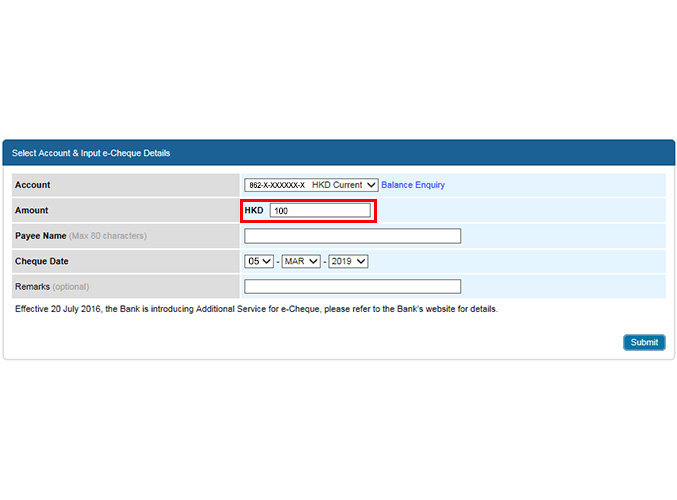
Step 4: Input amount
Issue e-Cheque
Service
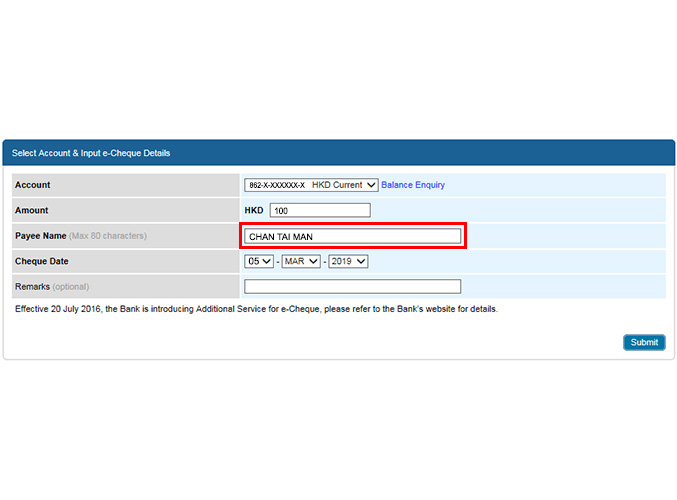
Step 5: Input Payee Name
Issue e-Cheque
Service
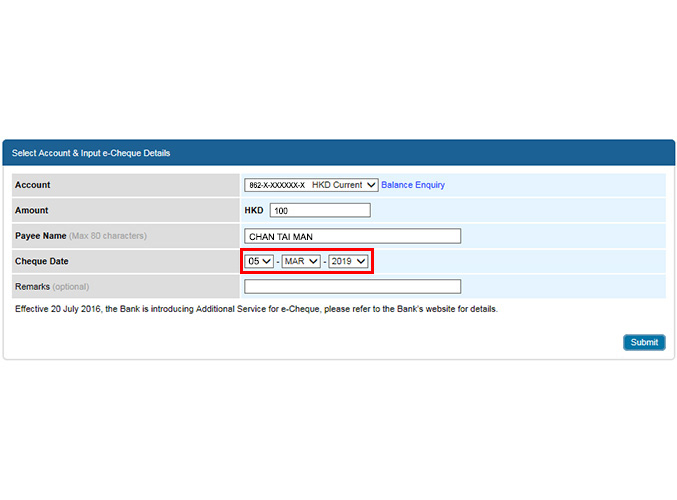
Step 6: Select Cheque Date
Issue e-Cheque
Service
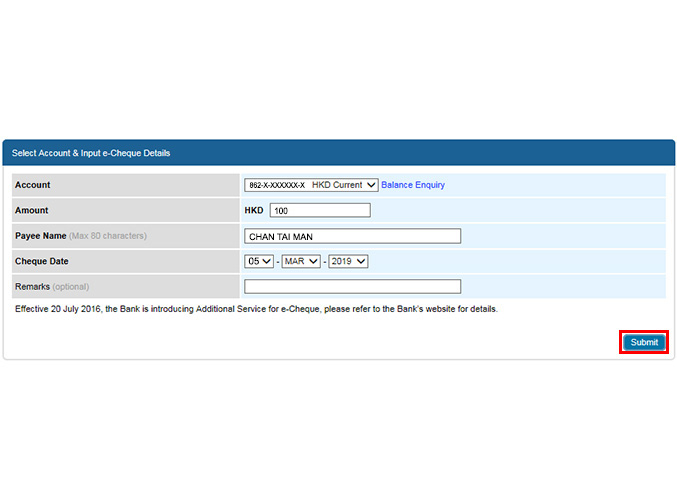
Step 7: Click "Submit"
Issue e-Cheque Service:
Confirm e-Cheque details for issuance
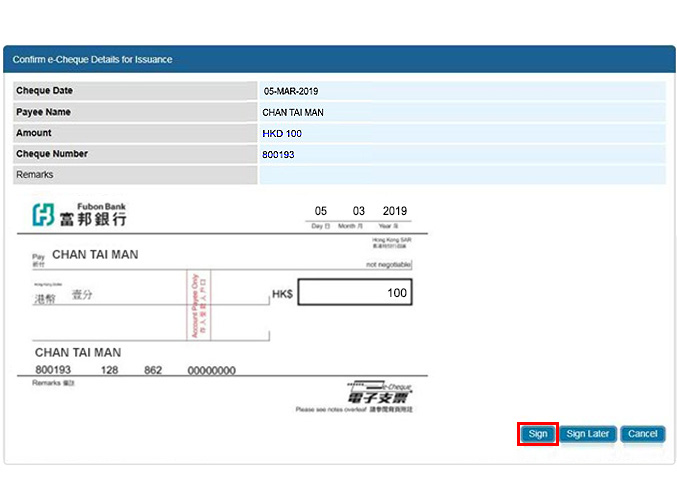
Step 8: Click "Sign"
Issue e-Cheque Service:
Data Integrity
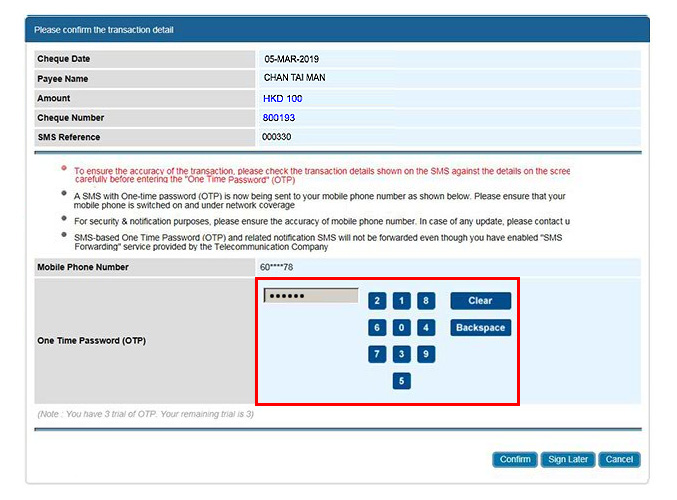
Step 9: Input SMS-based "One Time Password" issued by our Bank
Issue e-Cheque Service:
Data Integrity
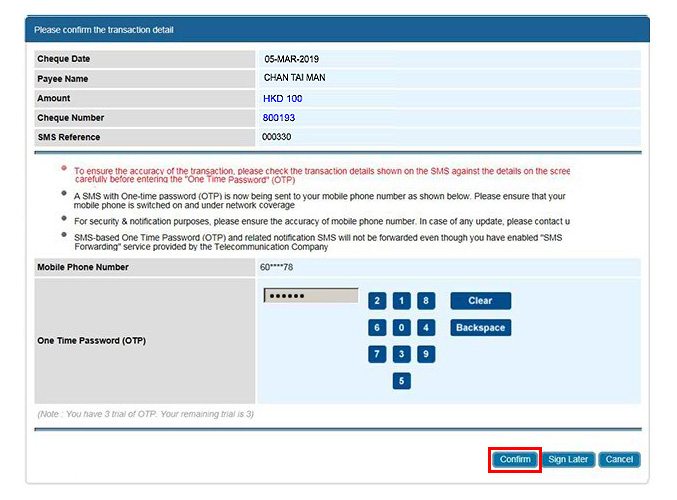
Step 10: Click "Confirm"
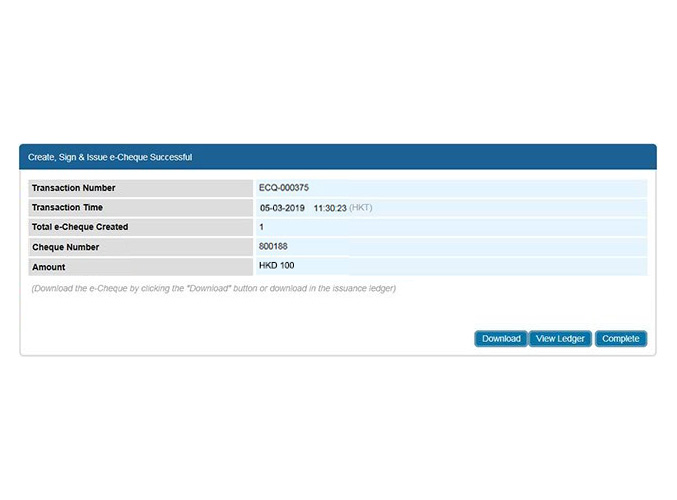
Issue e-Cheque Service:
Transaction is completed
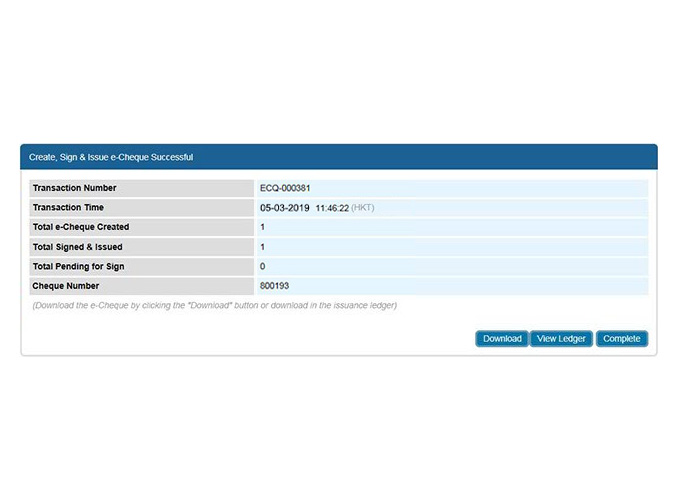
Your "Issue Single e-Cheque" is successfully completed.
Present e-Cheque
Step 1: Select "e-Cheque"
Present e-Cheque
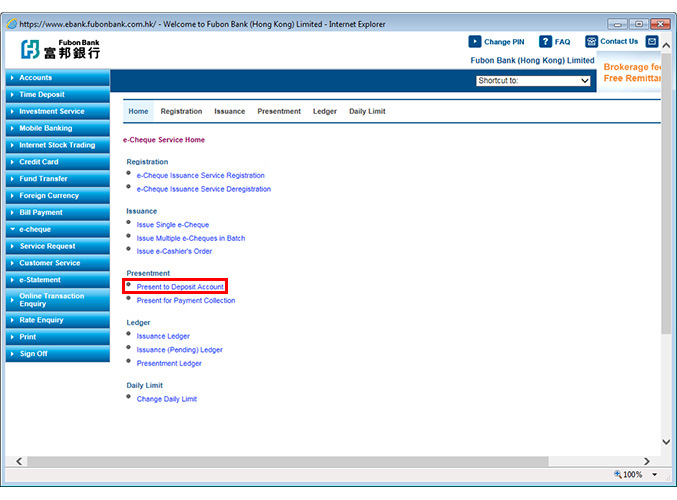
Step 2: Click "Present to Deposit Account"
Present e-Cheque
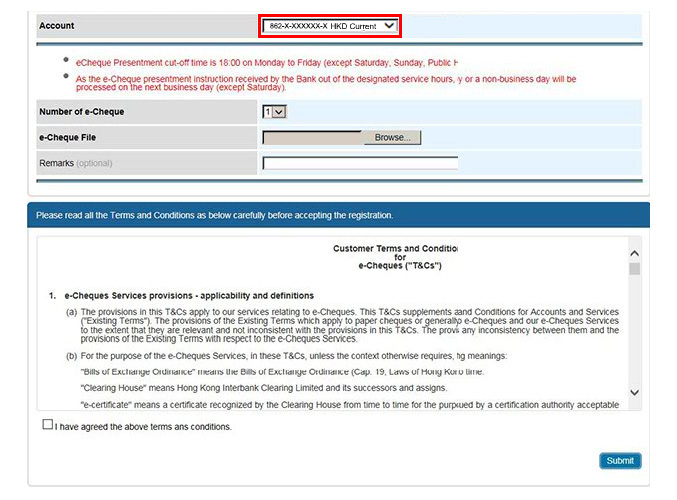
Step 3: Select account(s) for presentment
Present e-Cheque
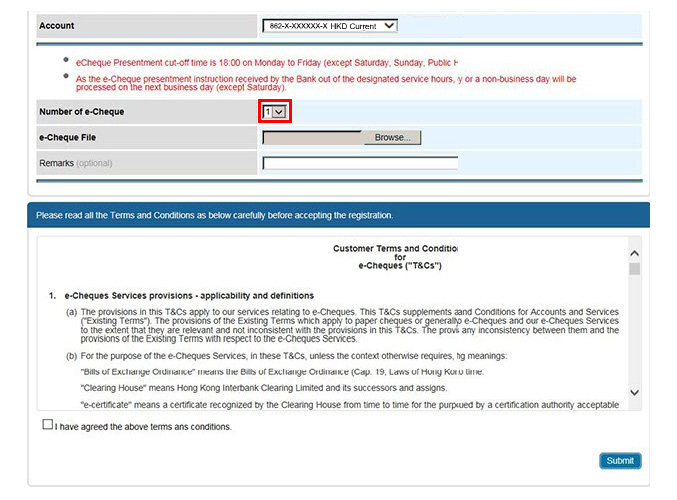
Step 4: Input number of e-Cheque
Present e-Cheque
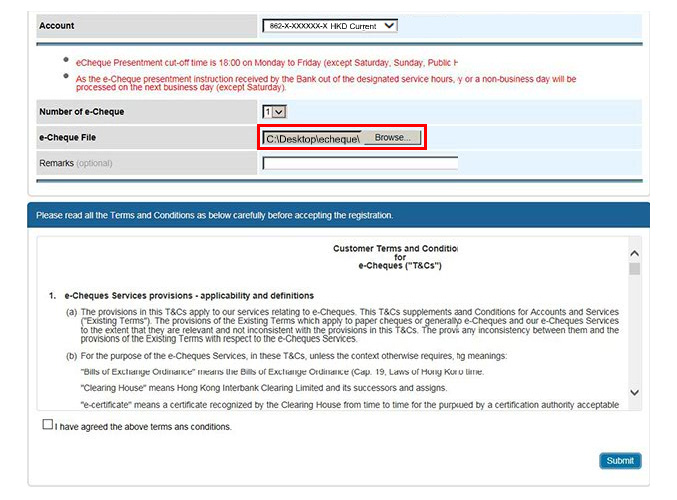
Step 5: Upload e-Cheque File
Present e-Cheque
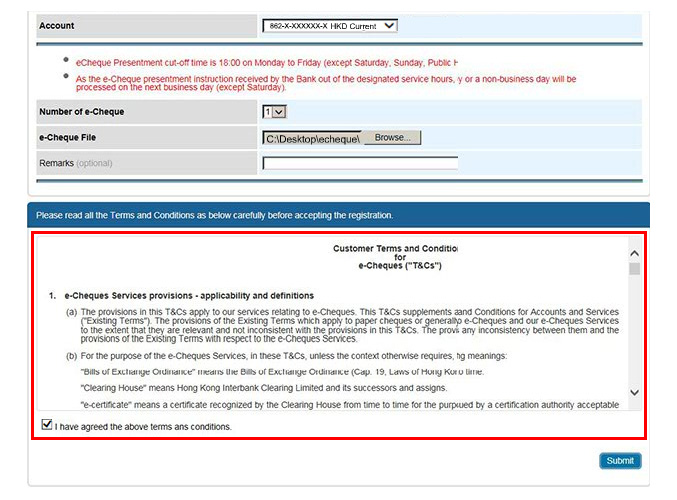
Step 6: Read and accept "Terms and Conditions"
Present e-Cheque
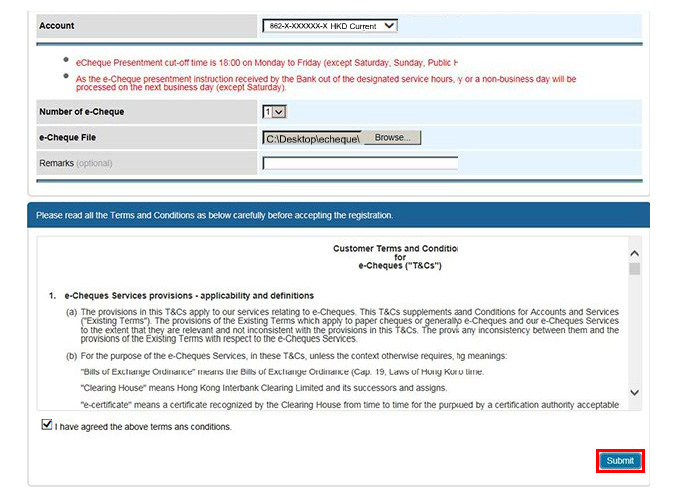
Step 7: Click "Submit"
Present e-Cheque: Confirm
e-Cheque details for presentment
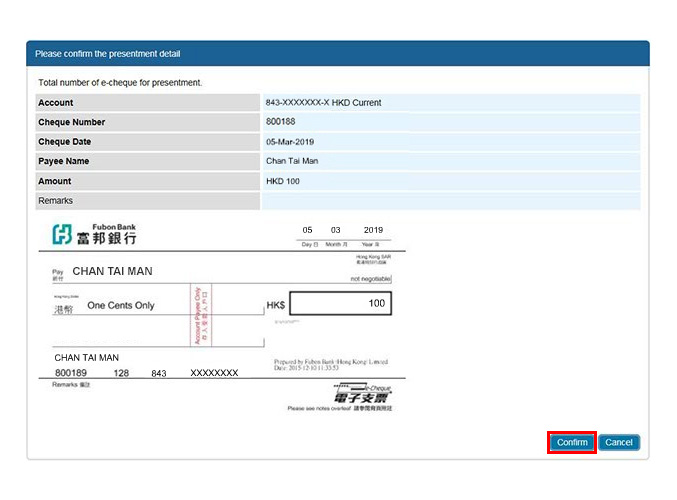
Step 8: Click "Confirm"
Present e-Cheque:
Transaction is completed
Your "Present to Deposit Account" is successfully completed.